I’ll be honest—I avoided making macarons for years because I thought they were way too fussy for me. All those warnings about humidity and oven temperature and aging your egg whites? It felt like I needed a chemistry degree just to make cookies.
But then I tried them anyway, and guess what? They actually worked. Sure, macarons have a few specific steps you need to follow, but once you get the hang of it, they’re totally doable. And strawberry macarons are a great place to start because the strawberry buttercream is so forgiving that even if your shells aren’t perfect, nobody will care once they taste that filling.
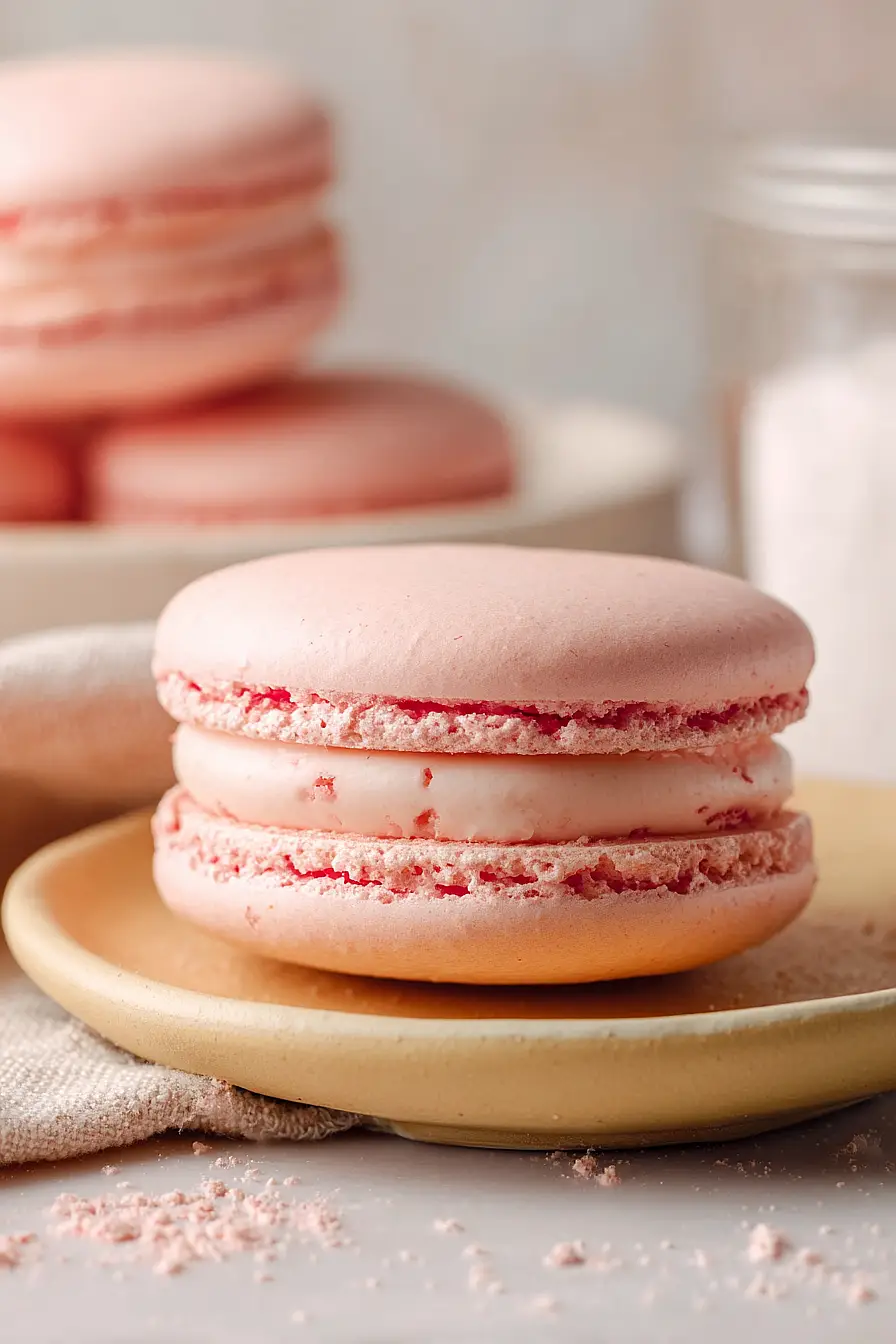
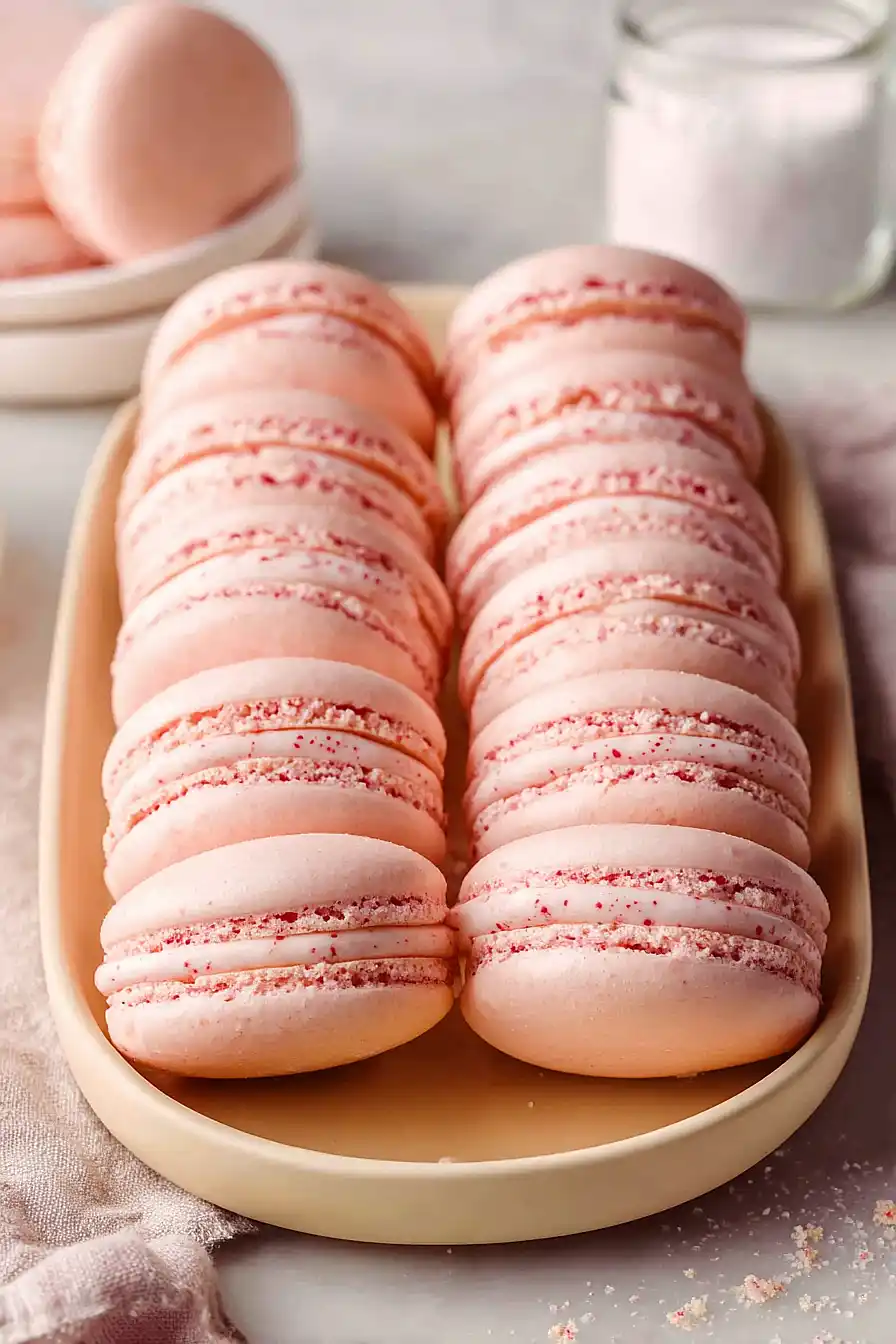
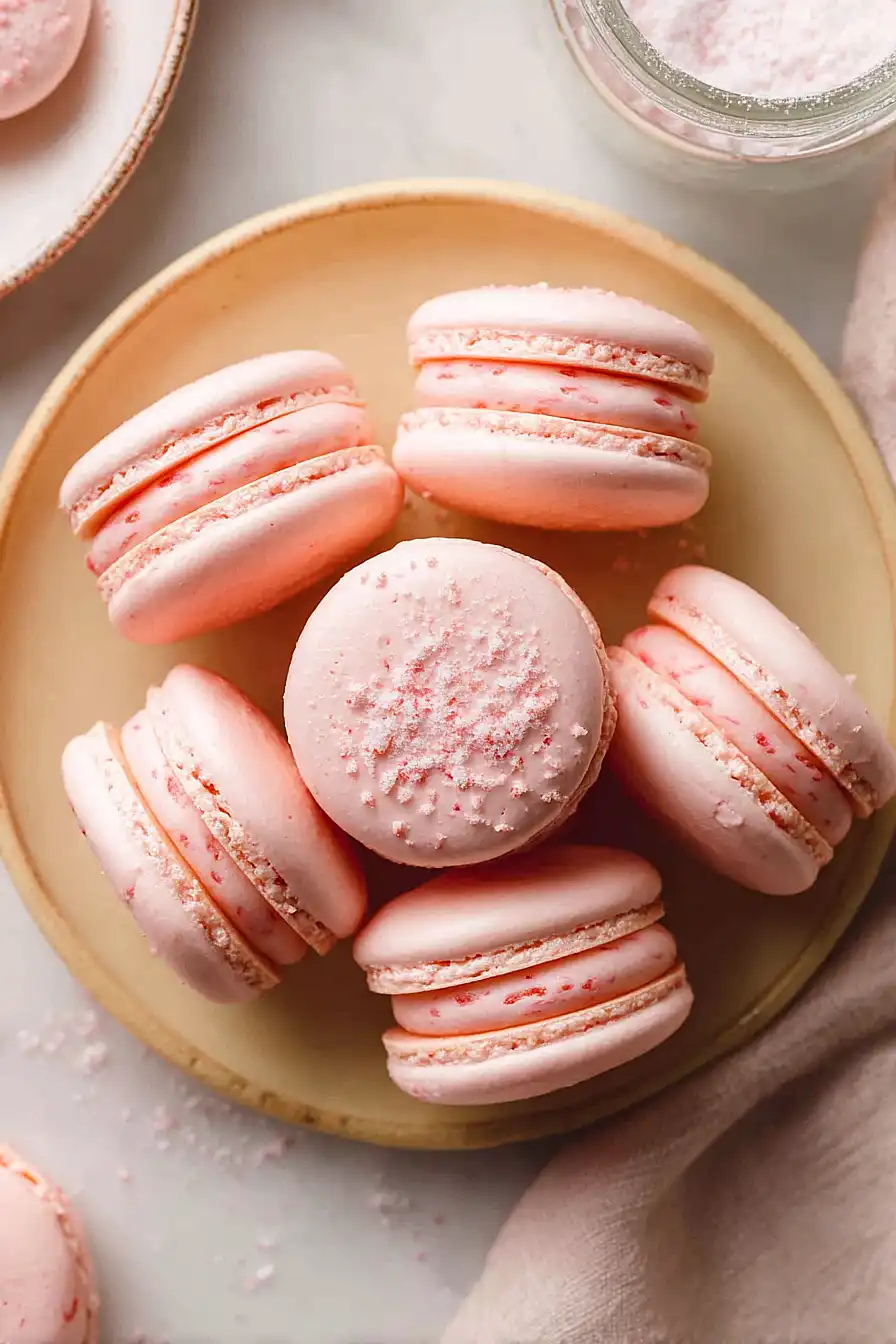
Why You’ll Love These Strawberry Macarons
- Impressive yet achievable – These French cookies look fancy and bakery-worthy, but with my step-by-step guidance, you can make them at home even if you’ve never tried before.
- Natural strawberry flavor – The freeze-dried strawberries in the buttercream give you real fruit flavor without adding extra moisture that could ruin your macarons.
- Simple ingredients – You probably have most of these pantry staples already, and the special ingredients like almond flour and freeze-dried strawberries are easy to find at most grocery stores.
- Perfect for special occasions – Whether it’s Valentine’s Day, a birthday party, or just because, these pretty pink cookies make any moment feel more special.
- Make-ahead friendly – You can bake these a day or two in advance and store them in the fridge, making party prep so much easier.
What Kind of Almond Flour Should I Use?
For macarons, you’ll want to use finely ground blanched almond flour, which is made from almonds with the skins removed. The super-fine texture is really important here because it helps create those smooth, glossy macaron shells that everyone loves. Avoid almond meal or almond flour with skins still on, as these are too coarse and will give you bumpy, grainy macarons instead of the smooth finish you’re after. If you’re not sure whether your almond flour is fine enough, you can sift it together with the powdered sugar to catch any larger pieces that might mess up your shells.
Options for Substitutions
Macarons are a bit finicky, so some ingredients really can’t be swapped, but here are a few options where you do have some flexibility:
- Almond flour: This one’s non-negotiable for traditional macarons. The almond flour creates that signature texture and flavor, so I wouldn’t recommend substituting it. Make sure you’re using finely ground almond flour, not almond meal.
- Egg whites: Fresh egg whites work best, but you can use carton egg whites in a pinch. Just measure by weight (100 grams) rather than volume for accuracy. Aged egg whites (left in the fridge for a day or two) actually work even better.
- Freeze-dried strawberries: You can swap these with freeze-dried raspberries, blueberries, or any other freeze-dried fruit for different flavors. Just make sure they’re freeze-dried, not regular dried fruit, and grind them into a fine powder.
- Heavy cream: Whole milk works just fine if you don’t have heavy cream on hand. The buttercream might be slightly less rich, but it’ll still taste great.
- Food coloring: This is totally optional. If you skip it, your macarons will have a more natural, pale color from the strawberry powder. Gel food coloring works better than liquid for macarons.
Watch Out for These Mistakes While Baking
The biggest mistake when making macarons is skipping the resting time before baking, which prevents the signature smooth shell and “feet” from forming – your piped circles need to sit for at least an hour until they’re dry to the touch and no longer sticky.
Undermixing or overmixing the batter is another common problem, so aim for a lava-like consistency that flows slowly off your spatula and settles back into itself within 10-15 seconds.
Humidity is the enemy of macarons, so avoid making them on rainy or humid days if possible, and make sure your egg whites are at room temperature and completely free of any yolk.
Finally, resist the urge to open the oven door during baking, as the temperature drop can cause your macarons to crack or collapse.
What to Serve With Strawberry Macarons?
Strawberry macarons are perfect for serving at afternoon tea parties or as a fancy dessert alongside a cup of coffee or Earl Grey tea. They pair really well with fresh berries like raspberries or blueberries on the side, which adds a nice fresh element to balance out the sweetness. You can also serve them with a scoop of vanilla ice cream or whipped cream for an extra indulgent treat. If you’re hosting a brunch, these macarons make a great addition to a dessert platter with other pastries like croissants or fruit tarts.
Storage Instructions
Store: Macarons actually get better after a day or two in the fridge! Keep them in an airtight container between layers of parchment paper for up to 5 days. The filling softens the shells just right, giving them that perfect chewy texture.
Freeze: These freeze really well for up to 3 months. Just arrange them in a single layer in a freezer-safe container with parchment paper between layers. When you’re ready to serve, let them thaw in the fridge overnight for best results.
Serve: For the best flavor and texture, let your macarons sit at room temperature for about 20 minutes before eating. They taste way better when they’re not super cold, and you’ll really be able to enjoy that strawberry flavor.
| Preparation Time | 90-120 minutes |
| Cooking Time | 15-30 minutes |
| Total Time | 120-150 minutes |
| Level of Difficulty | Hard |
| Servings | 24 cookies |
Estimated Nutrition
Estimated nutrition for the whole recipe (without optional ingredients):
- Calories: 1450-1600
- Protein: 15-20 g
- Fat: 55-65 g
- Carbohydrates: 230-250 g
Ingredients
For the macaron shells:
- 7 oz powdered sugar (high quality/fine consistency)
- 4 oz almond flour (sifted twice)
- 3.7 oz egg whites (room temperature and aged)
- 1.85 oz granulated sugar
- 2-3 drops red gel food coloring
- 1/4 teaspoon cream of tartar
For the strawberry stuffing:
- 4 oz unsalted butter (softened)
- 0.5 oz freeze-dried strawberries (pulverized into fine powder)
- 4.5 oz powdered sugar (sifted)
- 1.5 tablespoons heavy cream
- 1/2 teaspoon vanilla extract
Step 1: Prepare the Dry Ingredients and Equipment
- 7 oz powdered sugar
- 4 oz almond flour
Line a baking sheet with a silicone mat and set aside.
Sift the almond flour twice to remove any clumps and ensure a fine, smooth texture.
In a medium bowl, combine the sifted almond flour with the powdered sugar (the first 7 oz portion) and whisk together thoroughly.
This dry mixture is the foundation of the macaron shells, and the double-sifting of almond flour is crucial for achieving smooth, flat-topped macarons without cracks or feet issues.
Step 2: Make the Meringue Base
- 3.7 oz egg whites
- 1/4 teaspoon cream of tartar
- 1.85 oz granulated sugar
- 2-3 drops red gel food coloring
In a clean, grease-free bowl, combine the room temperature egg whites and cream of tartar.
Using an electric mixer on medium-high speed, beat until the mixture becomes frothy and soft peaks begin to form.
Gradually add the granulated sugar (1.85 oz) while continuing to beat, then add 2-3 drops of red gel food coloring.
Continue beating until stiff, glossy peaks form—the meringue should hold its shape completely when you lift the whisk.
I find that room temperature egg whites whip to much greater volume than cold ones, which is essential for creating those signature macaron feet.
Step 3: Create the Macaron Batter Through Macaronage
- meringue from Step 2
- dry ingredient mixture from Step 1
Add the meringue to the dry ingredient mixture from Step 1 in two additions.
Using a spatula, fold gently but deliberately, pressing the meringue against the side of the bowl to incorporate it slowly.
This technique, called macaronage, is critical—you want to deflate the meringue just enough to create a smooth, lava-like batter that flows slowly.
The batter should fall in a ribbon from the spatula; if it’s too thick, continue folding a few more times.
Transfer the batter to a piping bag fitted with a round 10mm tip.
Step 4: Pipe and Rest the Macaron Shells
- macaron batter from Step 3
Pipe 1-inch circles of batter onto the prepared baking sheet, spacing them about 1 inch apart.
Once piped, firmly tap the bottom of the baking sheet 5-6 times on the counter to release air bubbles and help the macarons spread slightly into even circles.
Use a toothpick to pop any remaining surface bubbles you can see.
Let the piped shells sit at room temperature for about 1 hour until they develop a dry skin on top—this is essential for creating the characteristic ruffled feet during baking.
I like to gently touch a shell with my finger; when ready, it should feel dry but the insides remain soft.
Step 5: Bake the Macaron Shells
- rested macaron shells from Step 4
While the shells rest, preheat your oven to 280°F.
Once the shells have rested and the oven is ready, place the baking sheet in the oven.
Bake for 15 minutes total, rotating the sheet 180 degrees every 5 minutes to ensure even baking.
The shells are done when they have formed distinctive feet around the base but the tops remain smooth and slightly domed.
Remove from the oven and let cool completely on the baking sheet—do not transfer them while still warm or they may crack.
Step 6: Prepare the Strawberry Buttercream Filling
- 4 oz unsalted butter
- 0.5 oz freeze-dried strawberries
- 4.5 oz powdered sugar
- 1.5 tablespoons heavy cream
- 1/2 teaspoon vanilla extract
While the shells cool, pulverize the freeze-dried strawberries into a fine powder—a food processor works perfectly for this.
In a medium bowl, beat the softened unsalted butter on medium-high speed for 2-3 minutes until it’s pale and fluffy.
Add the strawberry powder and half of the sifted powdered sugar (2.25 oz) and beat for another 2-3 minutes.
Add the remaining powdered sugar (2.25 oz) and continue beating for 5-6 minutes total until the filling is light, creamy, and well-combined.
If the mixture seems too stiff, add the heavy cream a little at a time while beating, followed by the vanilla extract, until you achieve a smooth, spreadable consistency.
Step 7: Assemble and Finish the Macarons
- cooled macaron shells from Step 5
- strawberry buttercream filling from Step 6
Once the shells are completely cool, carefully remove them from the silicone mat.
Match shells into pairs of similar size.
Pipe or spread a small amount of the strawberry buttercream filling from Step 6 onto the flat side of one shell, then gently press another shell on top, flat-side down, to create a sandwich.
For the best texture and flavor development, let the assembled macarons rest in an airtight container at room temperature for 24 hours before serving—this allows the flavors to meld and the shells to soften slightly into the ideal tender-but-not-chewy texture.
Tasty Strawberry Macarons
Ingredients
Method
- Line a baking sheet with a silicone mat and set aside. Sift the almond flour twice to remove any clumps and ensure a fine, smooth texture. In a medium bowl, combine the sifted almond flour with the powdered sugar (the first 7 oz portion) and whisk together thoroughly. This dry mixture is the foundation of the macaron shells, and the double-sifting of almond flour is crucial for achieving smooth, flat-topped macarons without cracks or feet issues.
- In a clean, grease-free bowl, combine the room temperature egg whites and cream of tartar. Using an electric mixer on medium-high speed, beat until the mixture becomes frothy and soft peaks begin to form. Gradually add the granulated sugar (1.85 oz) while continuing to beat, then add 2-3 drops of red gel food coloring. Continue beating until stiff, glossy peaks form—the meringue should hold its shape completely when you lift the whisk. I find that room temperature egg whites whip to much greater volume than cold ones, which is essential for creating those signature macaron feet.
- Add the meringue to the dry ingredient mixture from Step 1 in two additions. Using a spatula, fold gently but deliberately, pressing the meringue against the side of the bowl to incorporate it slowly. This technique, called macaronage, is critical—you want to deflate the meringue just enough to create a smooth, lava-like batter that flows slowly. The batter should fall in a ribbon from the spatula; if it's too thick, continue folding a few more times. Transfer the batter to a piping bag fitted with a round 10mm tip.
- Pipe 1-inch circles of batter onto the prepared baking sheet, spacing them about 1 inch apart. Once piped, firmly tap the bottom of the baking sheet 5-6 times on the counter to release air bubbles and help the macarons spread slightly into even circles. Use a toothpick to pop any remaining surface bubbles you can see. Let the piped shells sit at room temperature for about 1 hour until they develop a dry skin on top—this is essential for creating the characteristic ruffled feet during baking. I like to gently touch a shell with my finger; when ready, it should feel dry but the insides remain soft.
- While the shells rest, preheat your oven to 280°F. Once the shells have rested and the oven is ready, place the baking sheet in the oven. Bake for 15 minutes total, rotating the sheet 180 degrees every 5 minutes to ensure even baking. The shells are done when they have formed distinctive feet around the base but the tops remain smooth and slightly domed. Remove from the oven and let cool completely on the baking sheet—do not transfer them while still warm or they may crack.
- While the shells cool, pulverize the freeze-dried strawberries into a fine powder—a food processor works perfectly for this. In a medium bowl, beat the softened unsalted butter on medium-high speed for 2-3 minutes until it's pale and fluffy. Add the strawberry powder and half of the sifted powdered sugar (2.25 oz) and beat for another 2-3 minutes. Add the remaining powdered sugar (2.25 oz) and continue beating for 5-6 minutes total until the filling is light, creamy, and well-combined. If the mixture seems too stiff, add the heavy cream a little at a time while beating, followed by the vanilla extract, until you achieve a smooth, spreadable consistency.
- Once the shells are completely cool, carefully remove them from the silicone mat. Match shells into pairs of similar size. Pipe or spread a small amount of the strawberry buttercream filling from Step 6 onto the flat side of one shell, then gently press another shell on top, flat-side down, to create a sandwich. For the best texture and flavor development, let the assembled macarons rest in an airtight container at room temperature for 24 hours before serving—this allows the flavors to meld and the shells to soften slightly into the ideal tender-but-not-chewy texture.