I’ve been there—craving rich, fudgy brownies but realizing I’m out of eggs. Or maybe you’re baking for someone who can’t eat eggs. Either way, you shouldn’t have to give up on brownies. That’s when I discovered you don’t need eggs or condensed milk to make a batch that actually tastes good.
The secret is using simple ingredients you probably already have in your pantry. Butter, cocoa powder, and a splash of vanilla do most of the heavy lifting. I like to add a bit of espresso powder because it makes the chocolate flavor deeper without making your brownies taste like coffee. Trust me on this one.
These brownies come together in about ten minutes of mixing, and then your oven does the rest. No fancy techniques or hard-to-find ingredients. Just straightforward baking that gives you chewy edges and a soft center every single time.
Why You’ll Love These Eggless Brownies
- No eggs or condensed milk needed – Perfect for anyone with egg allergies or dietary restrictions, and you won’t need to run to the store for condensed milk either.
- Simple pantry ingredients – You probably already have butter, sugar, flour, and cocoa powder in your kitchen, making this an easy last-minute dessert.
- Quick and easy – These brownies come together in under an hour, so you can satisfy your chocolate cravings without spending all day in the kitchen.
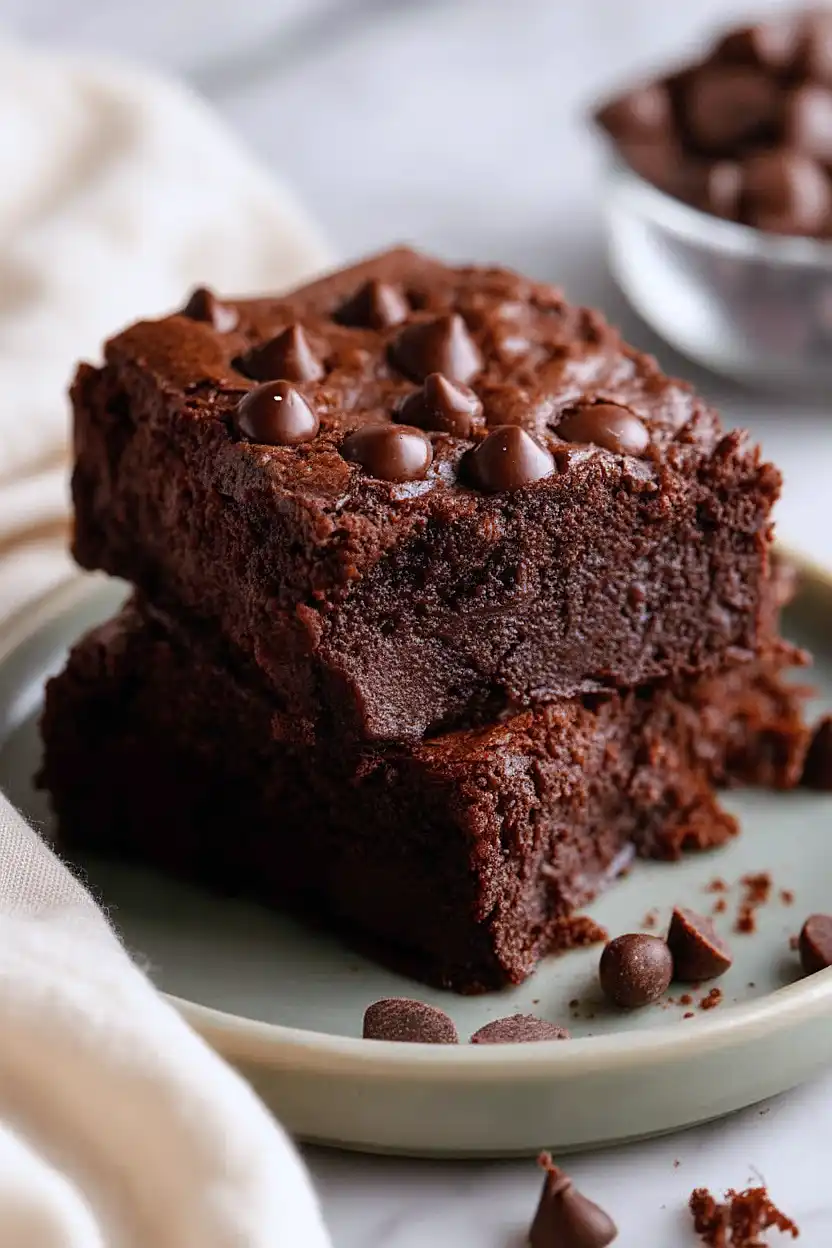
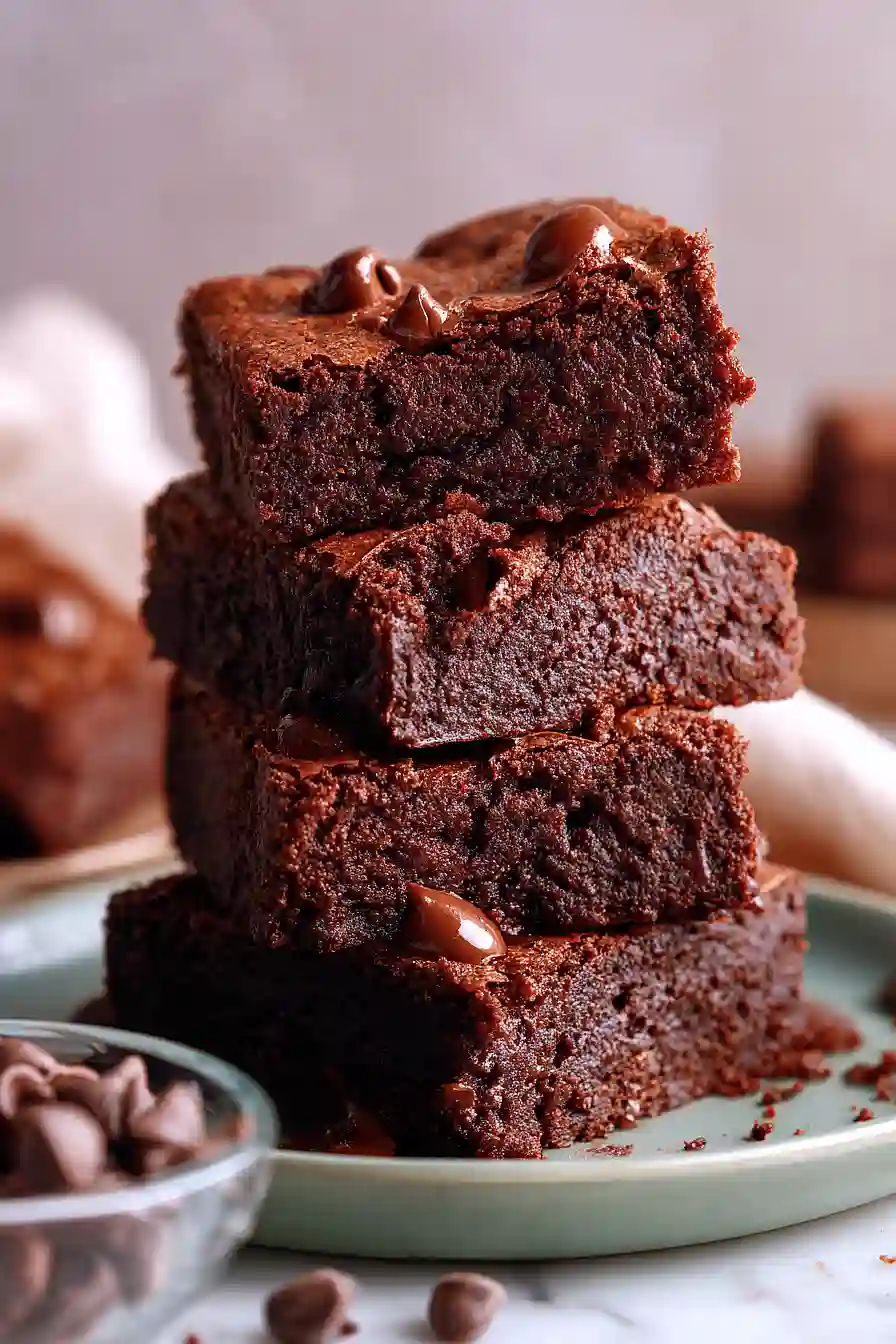
- Rich, fudgy texture – Even without eggs, these brownies turn out moist and chocolatey with melty chocolate chips in every bite.
What Kind of Cocoa Powder Should I Use?
For eggless brownies, you can use either natural cocoa powder or Dutch-processed cocoa powder, and both will give you great results. Natural cocoa powder has a lighter color and more acidic taste, which works well with the baking powder in this recipe, while Dutch-processed is darker and has a smoother, mellower flavor. If you want really rich, fudgy brownies, go for a high-quality cocoa powder rather than the cheapest option at the store – you’ll definitely taste the difference. Just make sure your cocoa powder is fresh and hasn’t been sitting in your pantry for years, as it can lose its flavor over time.

Options for Substitutions
This brownie recipe is pretty forgiving when it comes to swaps:
- Butter: You can use coconut oil or vegetable oil instead of butter. If using oil, stick with 1/2 cup (4 oz) and your brownies will turn out just as fudgy.
- Milk: Any milk works here – dairy, almond, soy, oat, or even coconut milk. They’ll all give you moist brownies, though coconut milk adds a subtle tropical note.
- Sugar: White sugar can be swapped with brown sugar for a deeper, molasses-like flavor. You can also use coconut sugar, though your brownies will be slightly less sweet.
- Cocoa powder: Dutch-process or natural cocoa both work fine. Just don’t skip the cocoa powder entirely – it’s what makes these brownies chocolatey and rich.
- Chocolate chips: Feel free to use chopped chocolate bars, white chocolate chips, or even peanut butter chips. You can also toss in some chopped nuts like walnuts or pecans for extra crunch.
- Flour: For a gluten-free version, use a 1:1 gluten-free flour blend. The texture will be slightly different but still tasty.
Watch Out for These Mistakes While Baking
The biggest mistake when making eggless brownies is overmixing the batter once you combine the wet and dry ingredients, which can lead to tough, cakey brownies instead of the fudgy texture you’re after – stir just until the flour disappears and you’re good to go.
Since these brownies don’t have eggs to help them set, overbaking is your enemy, so pull them out when a toothpick inserted in the center comes out with a few moist crumbs (not completely clean), as they’ll continue cooking in the pan.
Make sure your butter is fully melted and slightly cooled before mixing it with the sugar and milk, otherwise the batter can separate and create an oily layer on top.
For extra fudgy brownies, try adding an extra tablespoon of milk to the batter and reduce the baking time by 3-5 minutes, keeping a close eye on them after the 25-minute mark.
What to Serve With Eggless Brownies?
These fudgy brownies are perfect on their own, but they’re even better when served warm with a scoop of vanilla ice cream melting on top. You can also dust them with powdered sugar and serve alongside fresh berries like strawberries or raspberries for a nice contrast to the rich chocolate flavor. If you’re feeling fancy, drizzle some caramel or chocolate sauce over the top and add a dollop of whipped cream. For a cozy afternoon treat, pair these brownies with a cold glass of milk or your favorite hot coffee.
Storage Instructions
Store: Keep your brownies fresh by storing them in an airtight container at room temperature for up to 3 days. If you want them to last longer, pop them in the fridge where they’ll stay good for about a week. They actually taste pretty great cold too!
Freeze: These brownies freeze really well for up to 3 months. Just cut them into individual squares, wrap each one in plastic wrap, and store them in a freezer-safe container or bag. This way you can grab one whenever you need a chocolate fix!
Thaw: When you’re ready to eat a frozen brownie, just let it sit at room temperature for about 30 minutes. If you’re impatient like me, you can microwave it for 10-15 seconds to get that fresh-baked warmth back.
| Preparation Time | 10-15 minutes |
| Cooking Time | 30-40 minutes |
| Total Time | 40-55 minutes |
| Level of Difficulty | Easy |
| Servings | 16 pieces |
Estimated Nutrition
Estimated nutrition for the whole recipe (without optional ingredients):
- Calories: 2200-2400
- Protein: 23-28 g
- Fat: 110-120 g
- Carbohydrates: 310-330 g
Ingredients
For the batter:
- 5 oz butter (I like Kerrygold unsalted butter for this)
- 1 1/4 cups sugar
- 1/2 cup milk (room temperature, about 70°F)
- 1 1/2 tsp vanilla extract
- 1 cup all-purpose flour (I always use King Arthur all-purpose flour)
- 3/4 cup cocoa powder (sifted to remove lumps)
- 3/4 tsp baking powder
- 1/2 tsp salt
- 1/4 teaspoon espresso powder
For the topping:
- 1/2 cup chocolate chips (optional but recommended for extra richness)
Step 1: Prepare the Pan and Preheat Oven
Preheat your oven to 350°F.
While it heats, grease a 9×13 inch baking pan (or 8×8 if you prefer thicker brownies) with butter or cooking spray, making sure to coat the bottom and sides evenly.
This prevents sticking and ensures even browning on the edges.
Step 2: Sift Dry Ingredients and Add Espresso Powder
- 1 cup all-purpose flour
- 3/4 cup cocoa powder
- 3/4 tsp baking powder
- 1/2 tsp salt
- 1/4 teaspoon espresso powder
In a medium bowl, sift together the cocoa powder, all-purpose flour, baking powder, and salt.
This removes any lumps from the cocoa and aerates the flour, which helps create a lighter crumb.
Add the espresso powder and whisk everything together until well combined—the espresso enhances the chocolate flavor without making the brownies taste like coffee.
Set this dry mixture aside.
Step 3: Melt Butter and Combine Wet Ingredients
- 5 oz butter
- 1 1/4 cups sugar
- 1/2 cup milk
- 1 1/2 tsp vanilla extract
In a large bowl, melt the butter over low heat or in the microwave in 30-second intervals, stirring between each interval to avoid overheating.
Once melted and slightly cooled, add the sugar and stir vigorously for about 1 minute—this helps dissolve the sugar and create a smoother batter.
Pour in the room-temperature milk and vanilla extract, whisking until the mixture is smooth and well combined.
The room-temperature milk is important because cold milk can cause the melted butter to seize.
Step 4: Combine Wet and Dry Mixtures
- wet ingredient mixture from Step 3
- dry ingredient mixture from Step 2
Add the dry ingredient mixture from Step 2 to the wet mixture from Step 3.
Fold everything together with a spatula using a gentle folding motion (rather than aggressive stirring) until just combined—overmixing can lead to tough brownies.
A few small flour streaks are okay; stop folding as soon as you don’t see dry flour.
I like to use a spatula rather than a wooden spoon here because it gives me more control and helps me avoid overworking the batter.
Step 5: Add Chocolate Chips and Transfer to Pan
- batter from Step 4
- 1/2 cup chocolate chips
Fold the chocolate chips (if using) into the batter, distributing them evenly throughout.
Pour the batter into your prepared pan from Step 1, using a spatula to spread it in an even layer.
The chocolate chips add pockets of richness and are absolutely worth including—they make a difference in the final texture and flavor.
Step 6: Bake Until Set
Place the pan in your preheated 350°F oven and bake for 28-32 minutes.
The brownies are done when a toothpick inserted into the center comes out with a few moist crumbs (not wet batter, but not completely clean either).
The residual heat will continue cooking them slightly as they cool, so it’s better to slightly underbake than overbake.
Step 7: Cool and Cut into Squares
Remove the brownies from the oven and let them cool in the pan for at least 15 minutes at room temperature.
This cooling time allows the brownies to set properly so they cut cleanly without crumbling.
Once cooled, run a knife around the edges and cut into squares.
For cleaner cuts, I like to wipe my knife between each cut with a damp paper towel.
Moist Eggless Brownies Without Condensed Milk
Ingredients
Method
- Preheat your oven to 350°F. While it heats, grease a 9x13 inch baking pan (or 8x8 if you prefer thicker brownies) with butter or cooking spray, making sure to coat the bottom and sides evenly. This prevents sticking and ensures even browning on the edges.
- In a medium bowl, sift together the cocoa powder, all-purpose flour, baking powder, and salt. This removes any lumps from the cocoa and aerates the flour, which helps create a lighter crumb. Add the espresso powder and whisk everything together until well combined—the espresso enhances the chocolate flavor without making the brownies taste like coffee. Set this dry mixture aside.
- In a large bowl, melt the butter over low heat or in the microwave in 30-second intervals, stirring between each interval to avoid overheating. Once melted and slightly cooled, add the sugar and stir vigorously for about 1 minute—this helps dissolve the sugar and create a smoother batter. Pour in the room-temperature milk and vanilla extract, whisking until the mixture is smooth and well combined. The room-temperature milk is important because cold milk can cause the melted butter to seize.
- Add the dry ingredient mixture from Step 2 to the wet mixture from Step 3. Fold everything together with a spatula using a gentle folding motion (rather than aggressive stirring) until just combined—overmixing can lead to tough brownies. A few small flour streaks are okay; stop folding as soon as you don't see dry flour. I like to use a spatula rather than a wooden spoon here because it gives me more control and helps me avoid overworking the batter.
- Fold the chocolate chips (if using) into the batter, distributing them evenly throughout. Pour the batter into your prepared pan from Step 1, using a spatula to spread it in an even layer. The chocolate chips add pockets of richness and are absolutely worth including—they make a difference in the final texture and flavor.
- Place the pan in your preheated 350°F oven and bake for 28-32 minutes. The brownies are done when a toothpick inserted into the center comes out with a few moist crumbs (not wet batter, but not completely clean either). The residual heat will continue cooking them slightly as they cool, so it's better to slightly underbake than overbake.
- Remove the brownies from the oven and let them cool in the pan for at least 15 minutes at room temperature. This cooling time allows the brownies to set properly so they cut cleanly without crumbling. Once cooled, run a knife around the edges and cut into squares. For cleaner cuts, I like to wipe my knife between each cut with a damp paper towel.