Finding a healthier cookie recipe that actually tastes good can feel impossible. Most of the time, you’re stuck choosing between cookies that taste like cardboard or just giving in and making the regular sugar-loaded version, and when you’re trying to satisfy your sweet tooth without completely derailing your health goals, it’s a frustrating place to be.
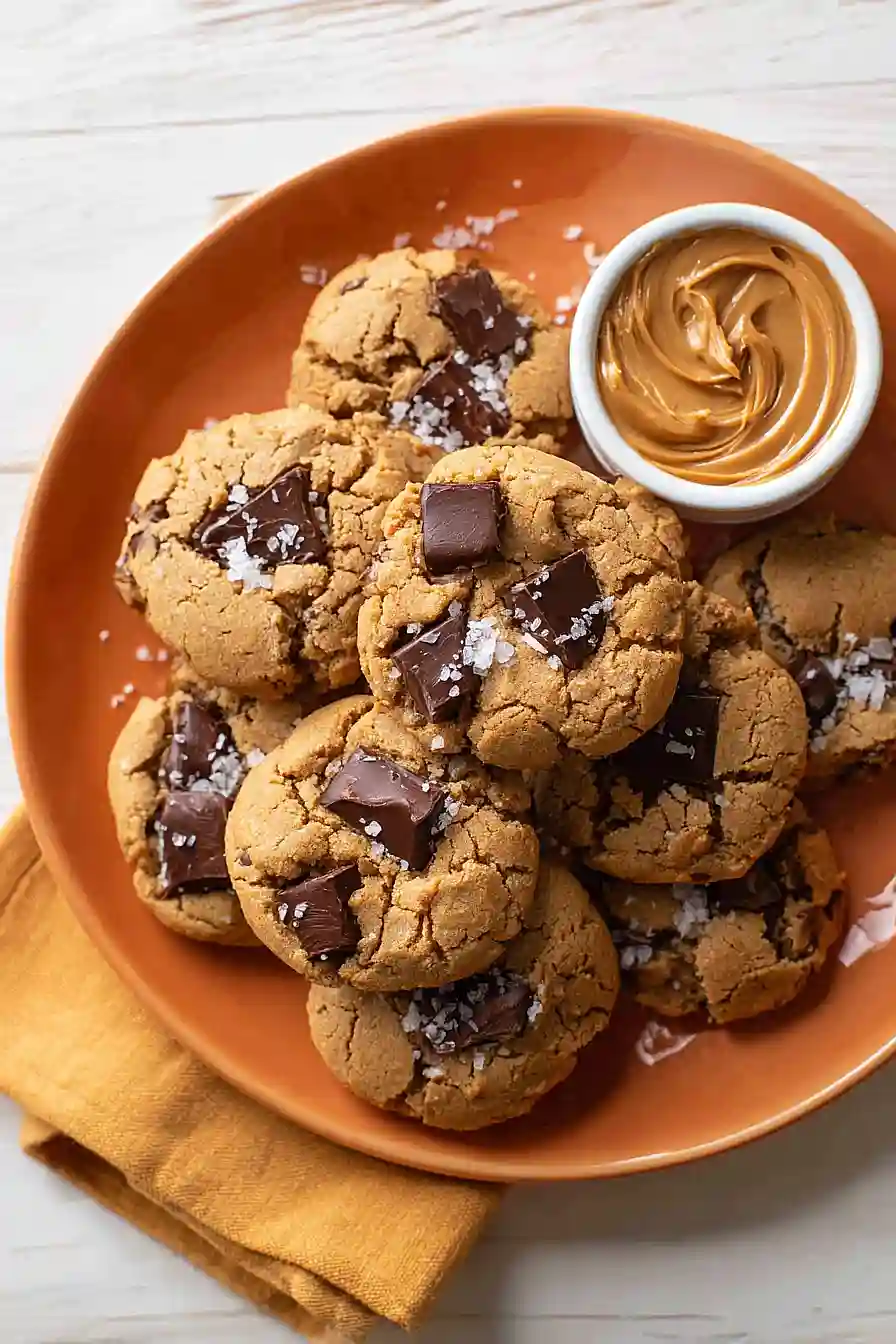
Thankfully, these peanut butter greek yogurt cookies solve that problem perfectly: they’re packed with protein from the yogurt and peanut butter, genuinely delicious with a soft and chewy texture, and come together in one bowl with no chilling required.

Why You’ll Love These Peanut Butter Greek Yogurt Cookies
- High-protein treat – The combination of peanut butter and Greek yogurt packs extra protein into every cookie, making them a more satisfying snack than regular cookies.
- Ready in under 30 minutes – From mixing bowl to cooling rack, these cookies come together quickly when you need a last-minute dessert or snack.
- Simple pantry ingredients – You probably have most of these items in your kitchen already, so no special trip to the store required.
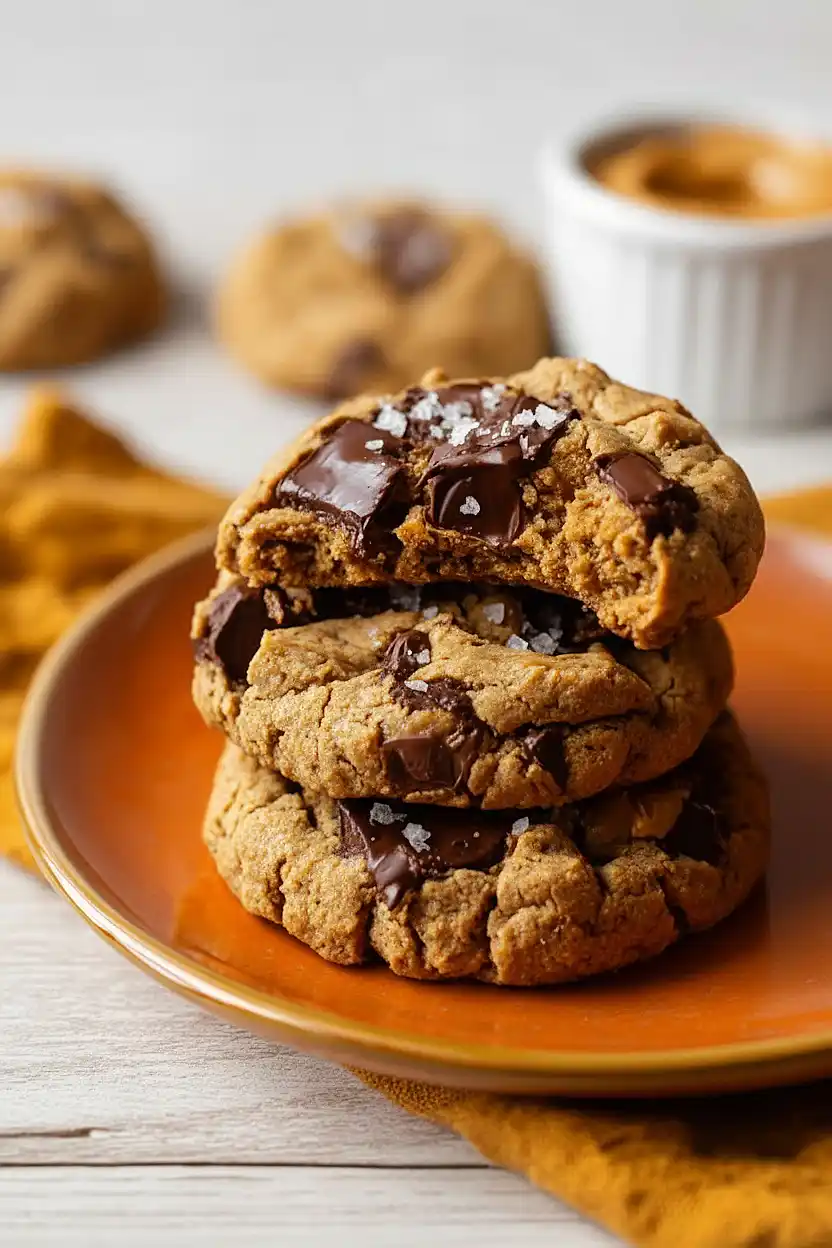
- Soft and chewy texture – The Greek yogurt keeps these cookies moist and tender, giving them that perfect chewy bite that everyone loves.
- Kid-approved – The classic peanut butter and chocolate combo makes these cookies a hit with kids and adults alike, and they’ll never guess there’s yogurt inside.
What Kind of Peanut Butter Should I Use?
For these cookies, you’ll want to stick with regular creamy peanut butter – the kind you find in a jar at any grocery store. Natural peanut butter (the kind where the oil separates on top) can make your cookies too oily and affect the texture, so save that for your toast. If you’re a chunky peanut butter fan, you can definitely use it here for some extra peanut pieces in your cookies, though creamy will give you a smoother, more consistent result. Just make sure whatever peanut butter you choose is well-stirred before measuring it out.
Options for Substitutions
These cookies are pretty forgiving when it comes to swaps, so here are some options if you need them:
- Peanut butter: You can use almond butter, cashew butter, or sunflower seed butter if you have a peanut allergy. Just keep in mind that sunflower seed butter might turn the cookies slightly green due to a reaction with baking soda – totally safe to eat, just a little funky looking.
- Greek yogurt: Regular yogurt works fine, though you might want to drain off any excess liquid first. You can also use sour cream or even mashed banana (about half a medium banana) for a different flavor twist.
- Brown sugar: White sugar will work in a pinch, though you’ll lose some of that molasses flavor. You can also try coconut sugar or maple syrup (reduce to about ½ cup since it’s liquid).
- Oats: Quick oats or old-fashioned oats both work great. If you need these gluten-free, just make sure your oats are certified gluten-free.
- Chocolate chips: Feel free to swap these with any mix-ins you like – peanut butter chips, butterscotch chips, chopped nuts, or dried fruit all work well. You can also leave them out completely for plain peanut butter cookies.
Watch Out for These Mistakes While Baking
The biggest mistake with these cookies is overbaking them – since they don’t have flour, they can go from perfectly soft to dry and crumbly in just a minute or two, so pull them out as soon as you see those cracks forming on top even if they look slightly underdone.
Make sure your peanut butter is at room temperature and well-stirred before mixing, because cold or separated peanut butter won’t blend smoothly with the other ingredients and can create an uneven texture.
Don’t skip the parchment paper or use a greased pan instead – these cookies are sticky due to the peanut butter and yogurt, and they’ll stick like crazy to anything but parchment.
Finally, give your cookies more space than the recipe suggests – aim for at least 2 inches between each scoop since they spread quite a bit during baking, and flattening them slightly before they go in the oven helps them bake more evenly.
What to Serve With Peanut Butter Greek Yogurt Cookies?
These cookies are pretty filling on their own thanks to the peanut butter and Greek yogurt, so they’re perfect with a cold glass of milk or a hot cup of coffee for dunking. If you’re serving them as an afternoon snack, pair them with some fresh apple slices or banana chunks since fruit and peanut butter are always a winning combination. For a dessert spread, set them out alongside some vanilla ice cream for cookie ice cream sandwiches, or just enjoy them warm from the oven with a drizzle of honey on top. They also make a great breakfast treat with a smoothie or some scrambled eggs if you want something more substantial to start your day.
Storage Instructions
Store: Keep these cookies in an airtight container at room temperature for up to 5 days. They’ll stay soft and chewy, especially if you toss a slice of bread in the container with them. You can also store them in the fridge if you prefer a firmer texture, and they’ll last about a week that way.
Freeze: These cookies are perfect for freezing! Stack them with parchment paper between layers in a freezer-safe container and they’ll keep for up to 3 months. You can also freeze the dough in individual cookie-sized balls on a baking sheet, then transfer to a bag once frozen so you can bake fresh cookies whenever a craving hits.
Thaw: Just leave frozen cookies out on the counter for about 20 minutes and they’re ready to eat. If you froze the dough, you can bake the frozen balls straight from the freezer—just add a couple extra minutes to the baking time.
| Preparation Time | 10-15 minutes |
| Cooking Time | 10-15 minutes |
| Total Time | 20-30 minutes |
| Level of Difficulty | Easy |
| Servings | 24 cookies |
Estimated Nutrition
Estimated nutrition for the whole recipe (without optional ingredients):
- Calories: 2450-2650
- Protein: 70-80 g
- Fat: 145-160 g
- Carbohydrates: 235-250 g
Ingredients
- 1 1/2 cups peanut butter (I use Jif creamy for the best consistency)
- 1/2 cup greek yogurt (I prefer Fage 2% for extra creaminess)
- 2/3 cup brown sugar
- 8 tbsp oats (rolled oats provide a much better chewy texture)
- 2 eggs (room temperature, about 70°F)
- 1 tsp baking soda
- 1 tsp salt
- 1/2 teaspoon vanilla extract
- 1/2 cup chocolate chips (Ghirardelli semi-sweet adds a rich flavor)
Step 1: Prepare Your Baking Station
Preheat your oven to 350°F and line a baking sheet with parchment paper.
This gives your oven time to reach the proper temperature while you prepare the dough, ensuring even baking throughout.
Step 2: Mix the Wet Base
- 1 1/2 cups peanut butter
- 1/2 cup greek yogurt
- 2/3 cup brown sugar
In a large bowl, combine the peanut butter, Greek yogurt, and brown sugar.
Stir vigorously until the mixture is smooth and well-blended—this creates a creamy base that will help the cookies achieve that characteristic chewy texture.
The room-temperature eggs will incorporate more smoothly into this mixture than cold ones.
Step 3: Build the Dough
- 2 eggs
- 8 tbsp rolled oats
- 1 tsp baking soda
- 1 tsp salt
- 1/2 teaspoon vanilla extract
Add the room-temperature eggs, one at a time, stirring well after each addition to fully incorporate them into the wet mixture.
This prevents lumps and ensures an even crumb structure.
Then add the rolled oats, baking soda, salt, and vanilla extract, stirring until just combined.
I find that rolling oats give a much better chewy texture than steel-cut oats, which can feel too dense in these cookies.
Step 4: Add Chocolate and Scoop
- 1/2 cup chocolate chips
- dough from Step 3
Fold in the chocolate chips gently until evenly distributed throughout the dough.
Using a cookie scoop or two spoons, drop rounded portions of dough onto your prepared baking sheet, spacing them about ½ inch apart to allow for slight spreading.
The dough should be thick and hold its shape well.
Step 5: Season and Bake
- salt for topping
- prepared cookies from Step 4
Sprinkle a pinch of fleur de sel or coarse salt on top of each cookie before baking—this enhances the peanut butter flavor and creates a subtle sweet-salty contrast.
Bake for 10-15 minutes, until the tops develop visible cracks and the edges are set but the centers still feel slightly soft to the touch.
The cookies will continue to firm up as they cool on the baking sheet.
Step 6: Cool and Serve
- baked cookies from Step 5
Allow the cookies to cool on the baking sheet for 5 minutes before transferring them to a wire rack.
I like to let them rest on the sheet first because they’re still delicate and will hold together better.
This results in perfectly chewy cookies with crispy edges.
Homemade Peanut Butter Greek Yogurt Cookies
Ingredients
Method
- Preheat your oven to 350°F and line a baking sheet with parchment paper. This gives your oven time to reach the proper temperature while you prepare the dough, ensuring even baking throughout.
- In a large bowl, combine the peanut butter, Greek yogurt, and brown sugar. Stir vigorously until the mixture is smooth and well-blended—this creates a creamy base that will help the cookies achieve that characteristic chewy texture. The room-temperature eggs will incorporate more smoothly into this mixture than cold ones.
- Add the room-temperature eggs, one at a time, stirring well after each addition to fully incorporate them into the wet mixture. This prevents lumps and ensures an even crumb structure. Then add the rolled oats, baking soda, salt, and vanilla extract, stirring until just combined. I find that rolling oats give a much better chewy texture than steel-cut oats, which can feel too dense in these cookies.
- Fold in the chocolate chips gently until evenly distributed throughout the dough. Using a cookie scoop or two spoons, drop rounded portions of dough onto your prepared baking sheet, spacing them about ½ inch apart to allow for slight spreading. The dough should be thick and hold its shape well.
- Sprinkle a pinch of fleur de sel or coarse salt on top of each cookie before baking—this enhances the peanut butter flavor and creates a subtle sweet-salty contrast. Bake for 10-15 minutes, until the tops develop visible cracks and the edges are set but the centers still feel slightly soft to the touch. The cookies will continue to firm up as they cool on the baking sheet.
- Allow the cookies to cool on the baking sheet for 5 minutes before transferring them to a wire rack. I like to let them rest on the sheet first because they're still delicate and will hold together better. This results in perfectly chewy cookies with crispy edges.